Okta
Setup and configuration
To set up your Steady workspace with SSO/SAML and Okta, you’ll need to take the following steps. Right now there is still a manual step on our end, so we’ll need the link from the last step along with a heads-up that you would like to enable SSO/SAML with Okta for your workspace.
Once we confirm that everything works, we’ll disable password authentication and magic link sign-in capability completely for your workspace.
Here are the steps:
-
Log in to your Okta organization as a user with administrative privileges
-
Click on the “Applications” menu
-
Click on “Create App Integration” and select “SAML 2.0”
-
For the App name, use “Steady”
-
Optionally add our logo if you like, you can download it here.
-
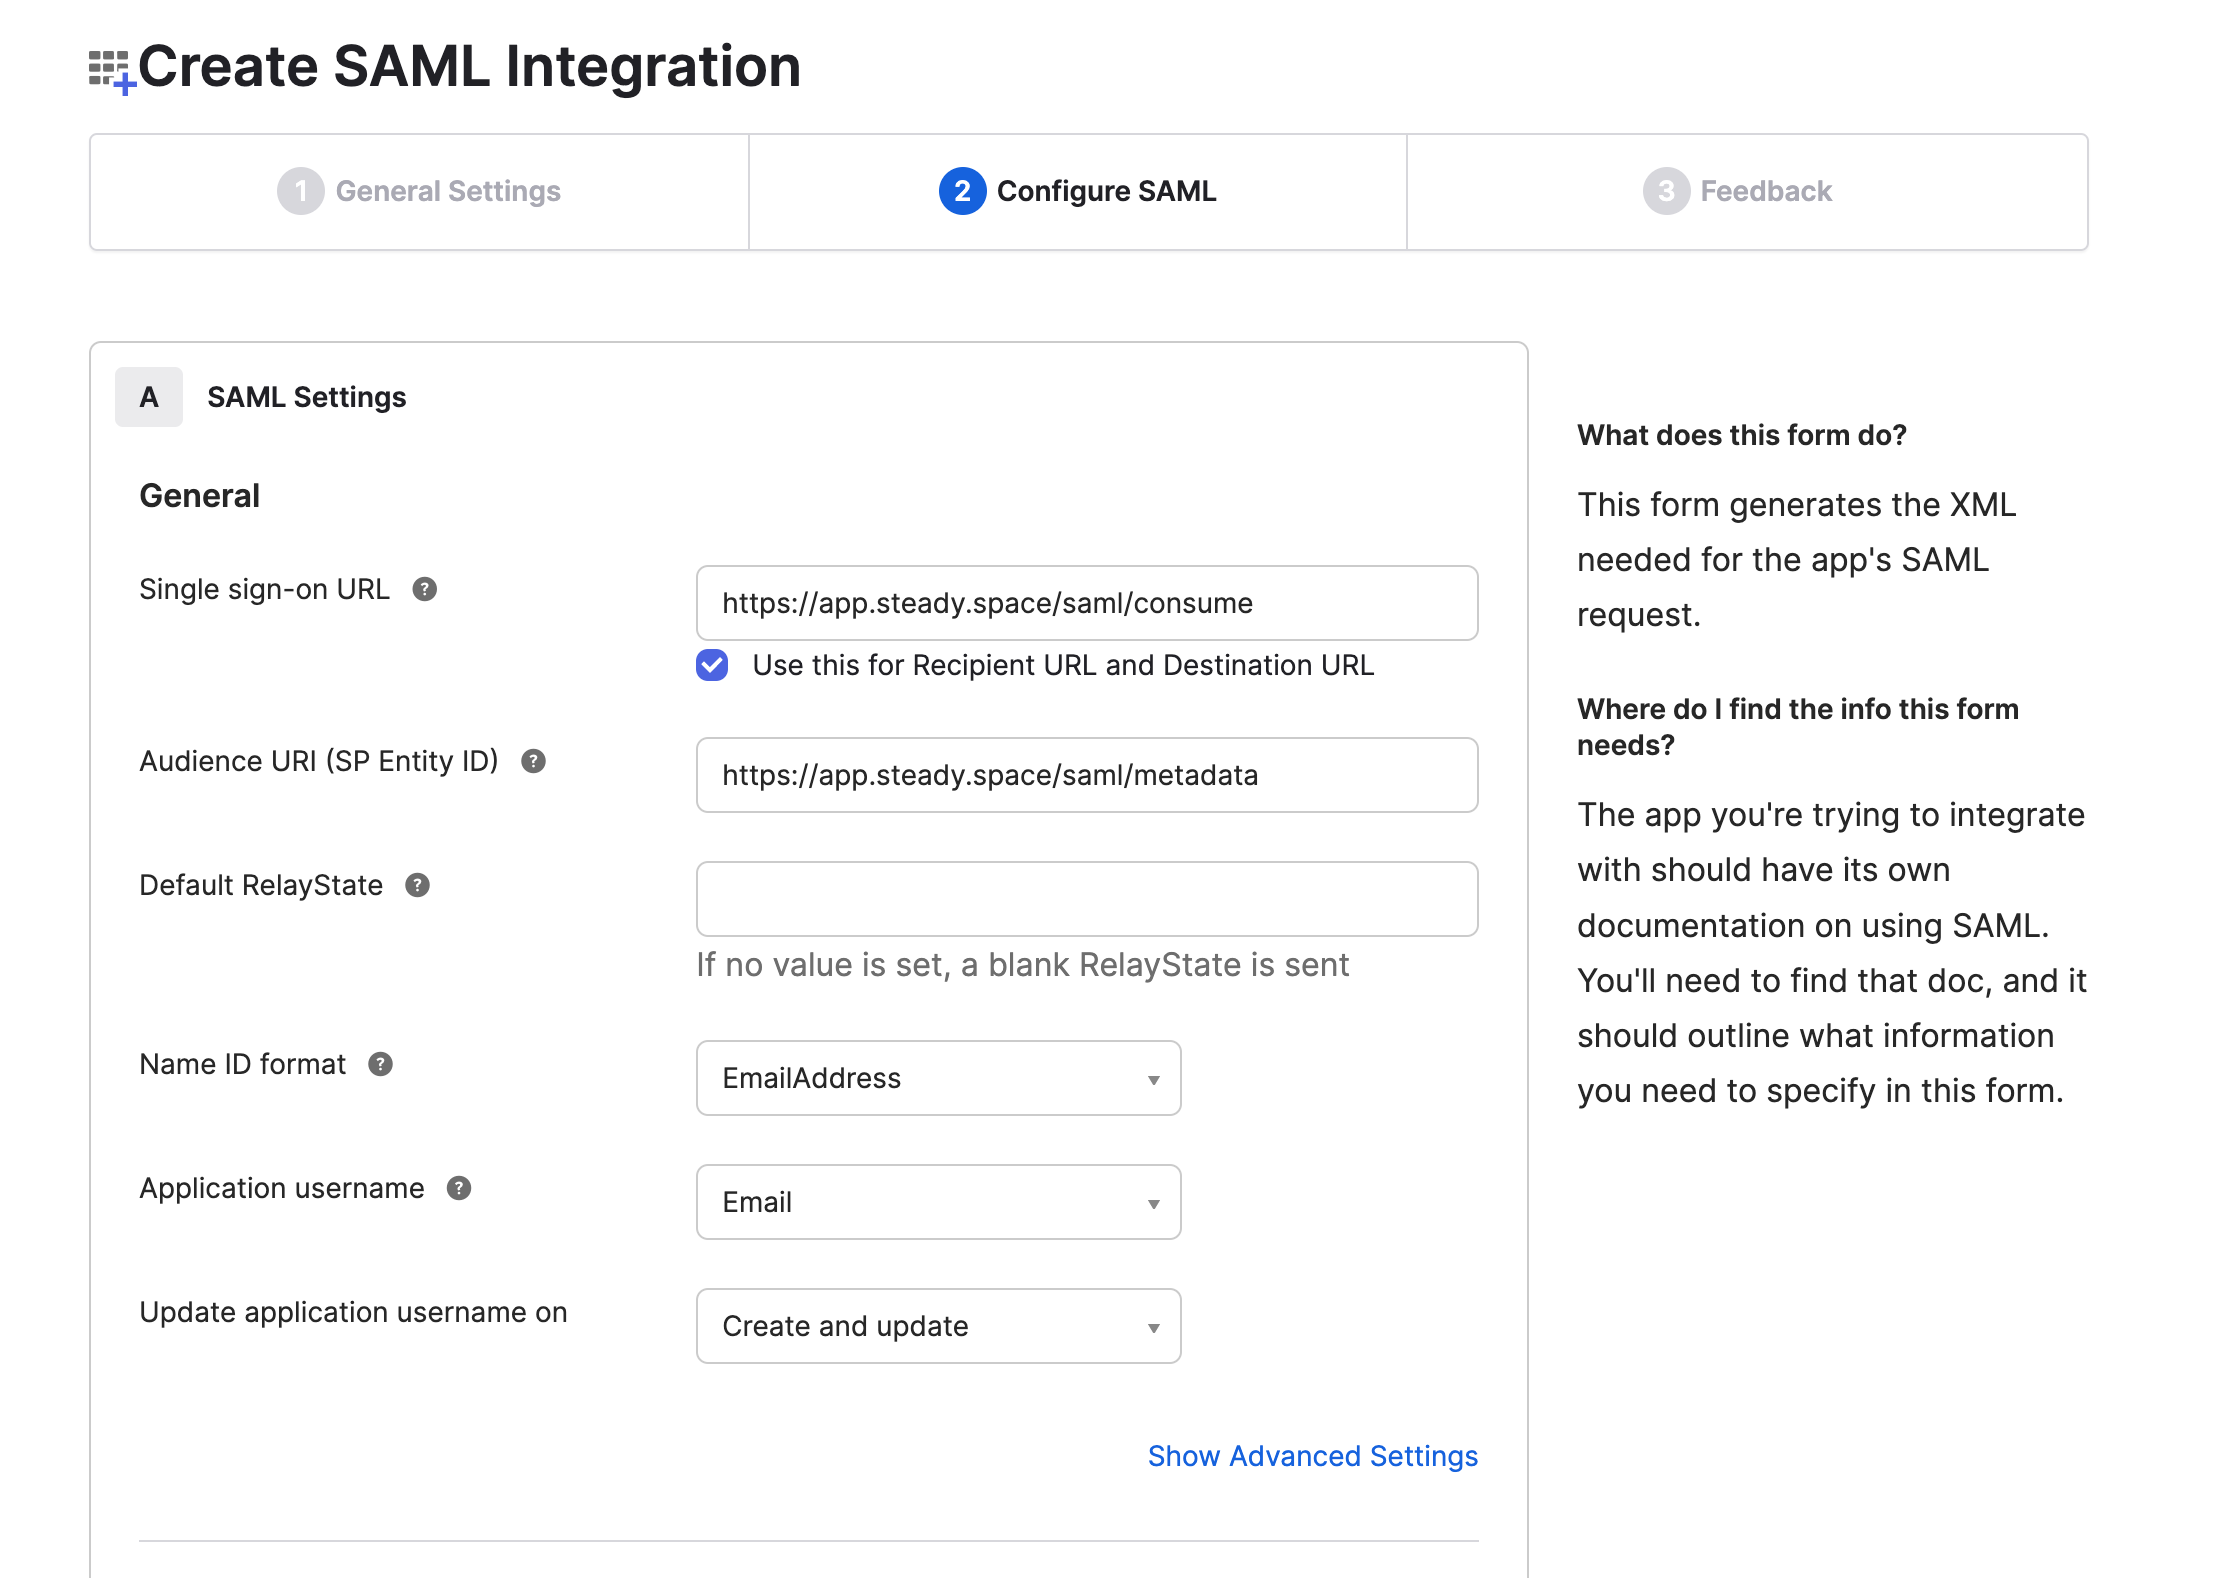
On the next screen, use https://app.steady.space/saml/consume for the “Single sign-on URL”
-
For “Audience URI (SP Entity ID)” use https://app.steady.space/saml/metadata
-
For “Name ID format” select “EmailAddress”
-
For “Application username” select “Email”
-
Click Next
-
Select “I’m an Okta customer…” and “Finish”
-
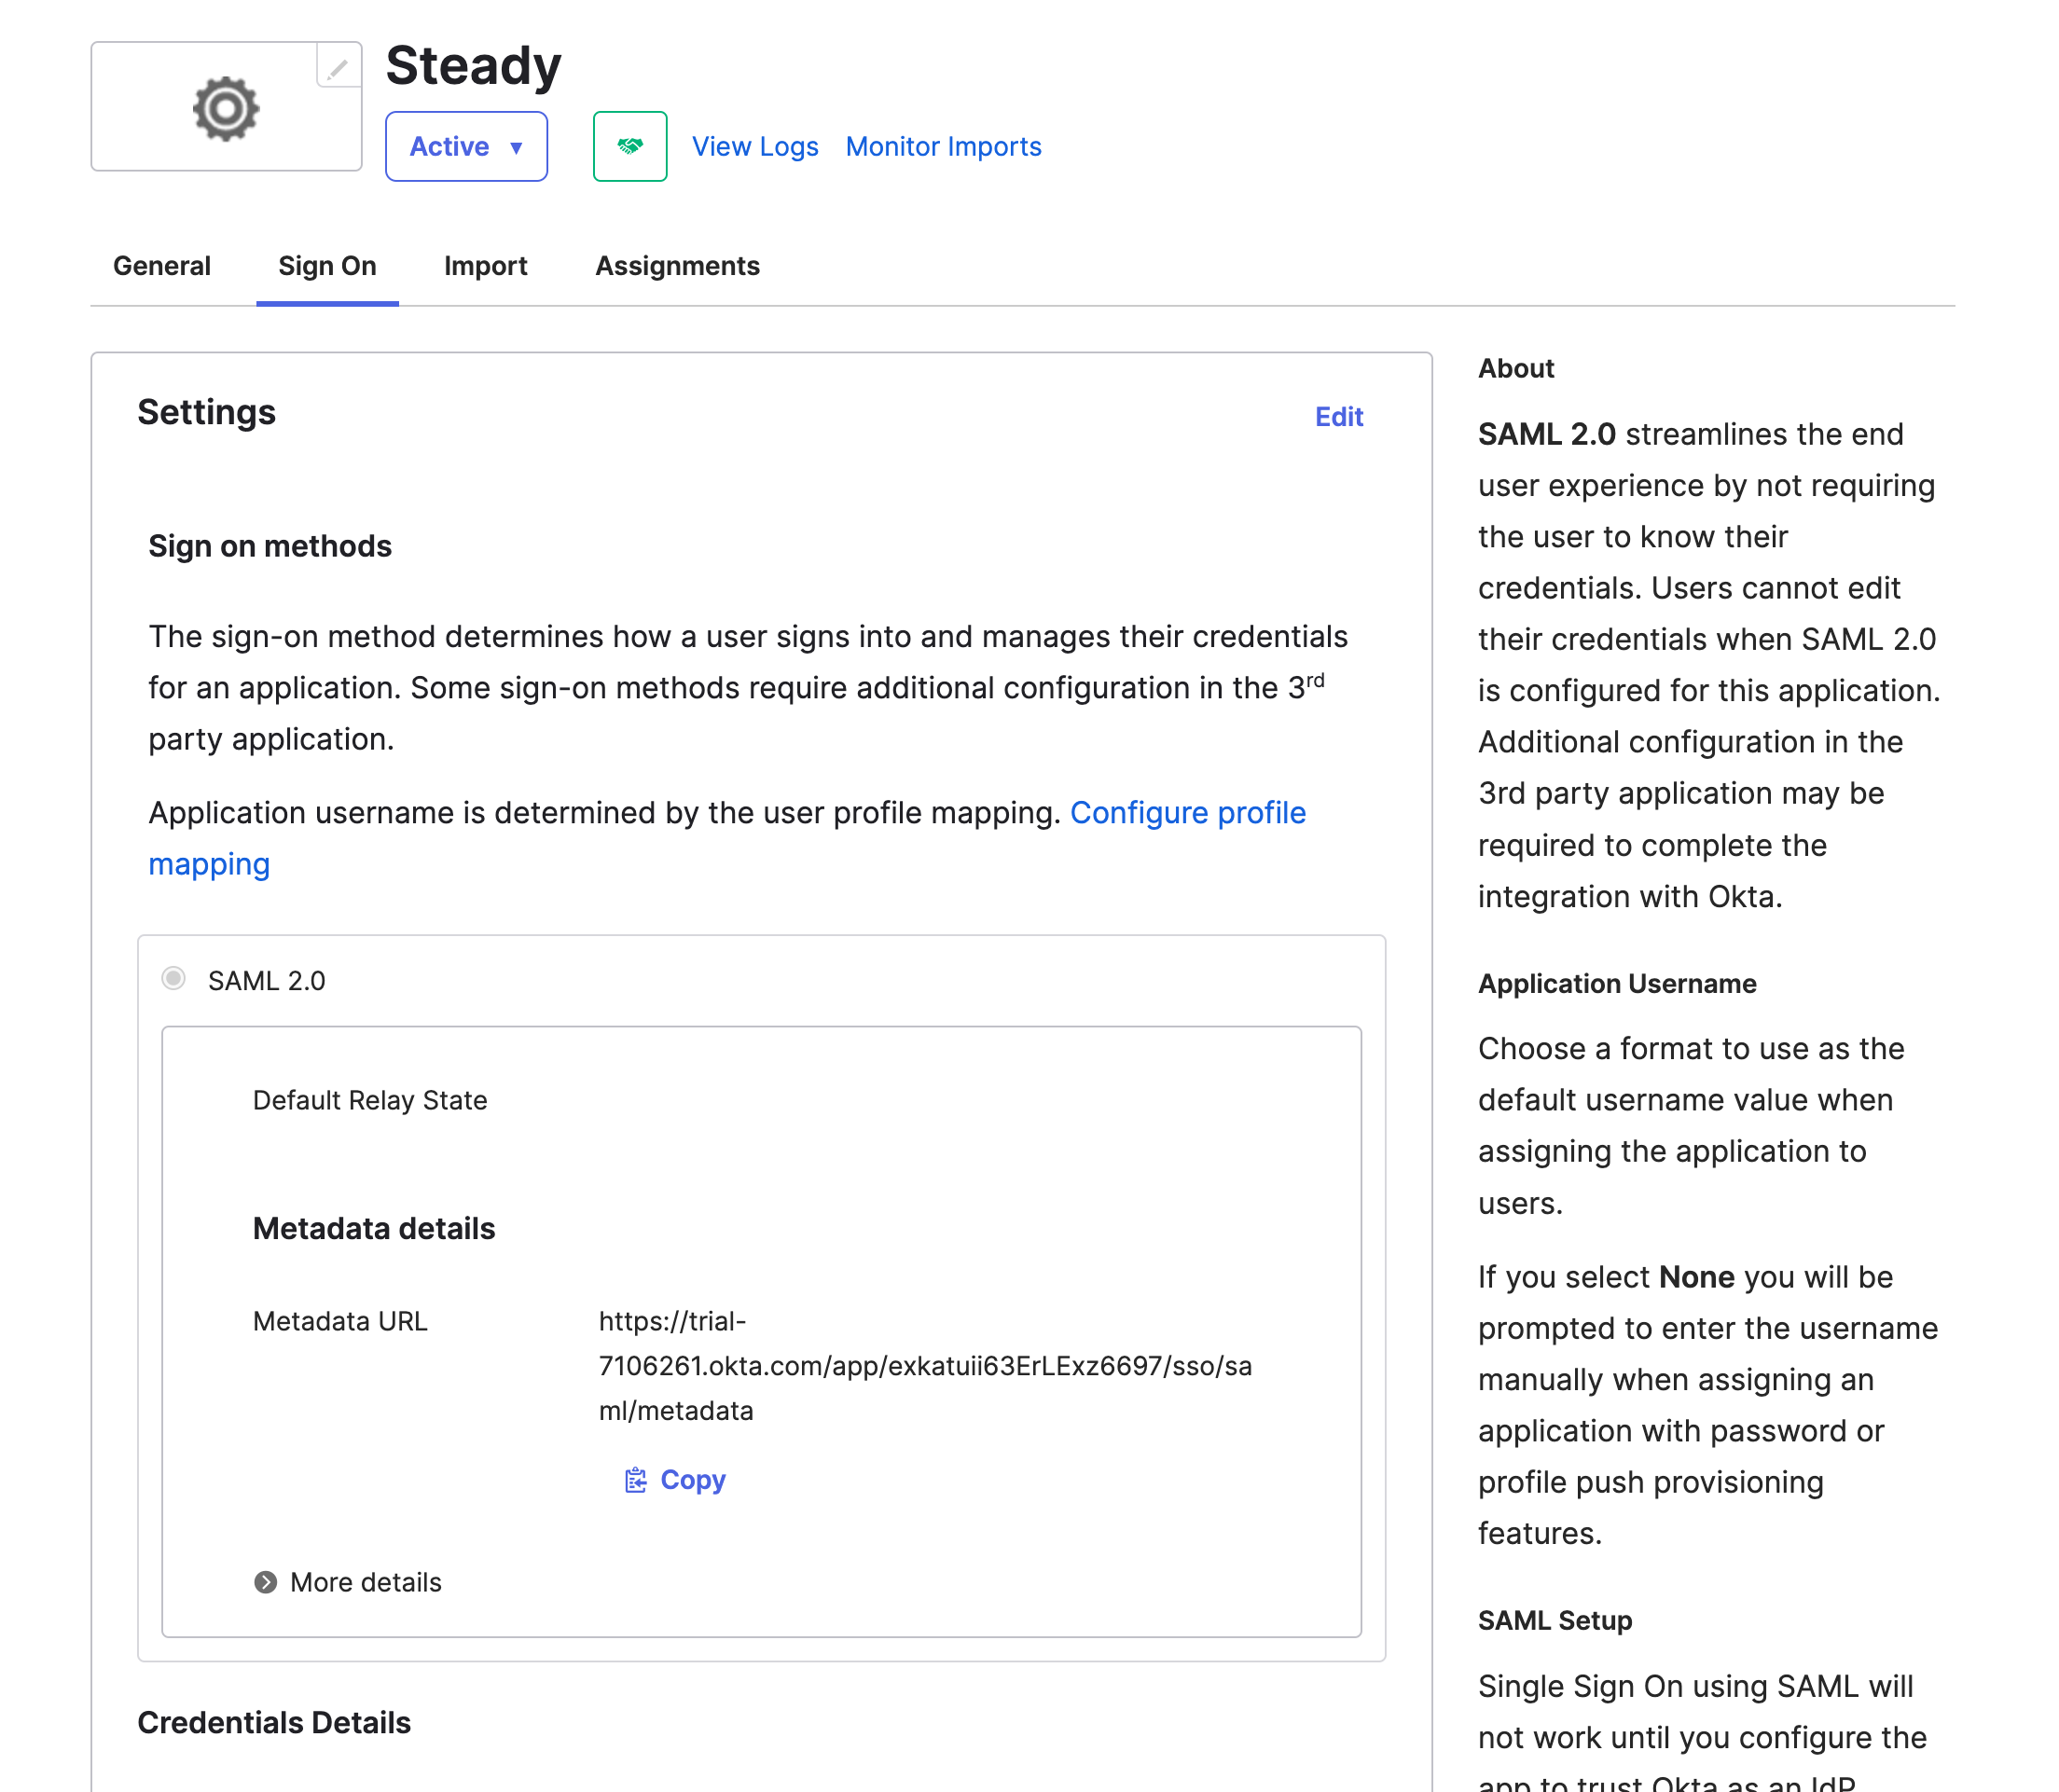
Under “Sign On”, tab, copy the link for the “Metadata URL” as shown in the screenshot below and send it to us at support@support.steady.space (or within the support chat).
-
Assign the relevant users under the “Assignments” tab

Test with Steady
- Once we’ve received your Metadata URL, we’ll enable SSO authentication for your workspace. You’ll need to have the email addresses of the users in Steady match the users you have enabled for the application in Okta.
- You can test the configuration at https://app.steady.space/saml/sign_in.
- Once you’ve confirmed with us that the authentication is working as expected, we’ll disable conventional login/password access for your workspace.
Provisioning users
Once you have the application setup in Okta, you can either add users to both Okta and Steady, or use SCIM provisioning.
SCIM provisioning
Here’s how to set up SCIM Provisioning for your workspace:
- Under the “General” tab, select “Edit” in the “App Settings” section.
- Select “SCIM” from the “Provisioning” options and “Save”
- Under the “Provisioning” tab, click “Edit”
- Fill in the “SCIM connector base URL” with the “SCIM v2.0 Base URL” found in your Steady workspace settings.
- Enter “email” for the “Unique identifier field for users”
- Check “Import New Users and Profile Updates”, “Push New Users”, and “Push Profile Updates”
- For “Authentication Mode”, select “HTTP Header”
- Fill in the Authorization field with the “SCIM Bearer Token” found in your Steady workspace settings.
- Test the connection with the “Test API Credentials” button
- Click “Save”
Once that’s done, you’ll able to assign and un-assign users to Steady from the Assignments tab. To see the users as they appear in Steady, visit the “People” tab in your workspace settings in Steady.